Saturday 28 March 2015

Happy easter card using the oval framelits

Hi stampers , 
 Welcome back, today's card is a easter card, yes I know it's early but I had an idea in my head for this card so I just had to make and I have to say I love how it turned out.

I started of with a standard card base using very vanilla cardstock cut at 8 x 5/12 and scored at 4 

I then took my second largest oval framelit and cut the card base with it to create and oval ( egg shaped! ) card. To do this you need to place you die just above the fold line on the card.


I then took a large post it not and masked of the centre of the card with it.
 I then stamped the positively chevron background stamp in calypso coral across the entire card. I didn't press down hard enough so it was as crisp a stamped image as I would have liked. 
I used my black stamping write marker to create the stitching around the edge and used the brush tip to create the frame for the happy easter sentiment from the delightful dozen stampset  which I stamp in tuxedo black
I then stamped the rabbit from the baby we've grown stamp set  in tuxedo black onto crumb cake cardstock  and coloured the belly  and paws using the aquapainter and the White craft pigment ink, to get he pink colour for the bunnys bow I mixed white craft ink with melon mambo using the aquapainter brush.

If you would like to purchase any of the products used in this project please click the shop now button for safe online ordering from my online shop 24/7. Alternatively send me an email, I'm always happy to help.

http://www2.stampinup.com/ECWeb/ItemList.aspx?categoryid=2693&dbwsdemoid=5010189
Happy stamping 

Lucie x


Friday 27 March 2015

Masking with colouring with butterfly basics

Hi stampers, 
  Today's cards was made withe butterfly basics stampset and the dictionary background stamp.

I used the negative space from a oval die that I cut with my big shot to create the mask which I used to stamp the dictionary background stamp on the card.

Card base cut from very vanilla cardstock 8 x 5 1/2 scored at 4 
1st layer in baked brown sugar cardstock cut at 5 1/4 x 3 3/4
2nd layer in whisper white cut at 5 x 3 1/2


After I stamped the dictionary background over the mask I removed the masked and stamped the beautiful flower in tuxedo black Momento ink, which I then coloured with my calypso coral blendabilities in light, medium and dark ( unfortunately the blendabilities have been discontinued by Stampin'Up! Due to quality issues ) but this can also be done with our stampin write markers too.
I then coloured the leaves with the pear pizazz blendabilities too and I just love how it turned out.

I then stamped the postage mark stamp in tuxedo black and stamped of once onto scrap paper to give lighter image, finally I stamped the butterfly sentiment in tuxedo black and it's done! 

I decided to sponge the edges of the stamped layer in crumb cake to give it a vintage look and I think I turned out nice.

I adhered all the layers to the card and it's done.....

If you would like to purchase any of the products used in this project , then please click on the shop now button for a direct link to my online shop, open 24/7. Alternatively send me and email, I'm always happy to help.

Happy stamping 
Lucie x 


http://www2.stampinup.com/ECWeb/ItemList.aspx?categoryid=2693&dbwsdemoid=5010189


Thursday 26 March 2015

Sweet stuff circle card


Hi stampers,

 Welcome back, for today's card I wanted to challenge myself to do something out of the norm. Not the standard size card but something different, so this is what I came up with.
I think it turned out cute and I will definately be doing more of this style in the future.


 For the card base I cut two of the second largest circle framelit dies in crumb cake, score along the top of on of the , creased it with the bone folder and adhered it to the the other circle to create a circle card. I also cut a little bit of the bottom of the back circle , just to make it stand up straight .

For the dotty background I used a scrap circle of rubber stamp that came out the centre of one of my others stamps, sorry I can' t remember which one!  But it was just the right size for what I needed. 

I first stamped randomly with the craft white pigment ink and then stamped over the top and just a smidge over in the melon mambo to create a shadow effect, which I think turned out great.

Then I went around the edge with my white gel pen to created the stitched effect. I then cut a slither of coastal cabana cardstock  and adhered it across the centre of the card.

I then cut a smaller circle from the circle framelits, again in crumb cake and did the stitched border in the gel pen again. I cut some basic black card with the small banner framelit die and embossed in white the happy birthday from the celebrate with cake stampset  and heat set. I then used my daffodil delight and melon mambo blendabilities to colour over the white embossed sentiment ( sadly the blendabilities have been discontinued by Stampin'Up! Due to quality issues ) but to process can also be done with our stampin write markers too.

I then stamped the ballerina and ice cream from the sweet stuff stampset on a scrap of whisper white cardstock coloured it in using my aqua painter and my inkpads in blushing bride,melon mambo, daffodil delight,coastal cabana, baked brown sugar and crumb cake and then cut it out with my paper snips leaving a small white border.
I then attached the happy birthday sentiment with tombow liquid glue and the attached the stamped coloured image using Dimensionals, then attached the smaller circle to the card base slightly to the right hand side with Dimensionals too.

I hope it inspires you to have a got a making your own version and I would love to see it..

To purchase any of the products used in this card project please click on the shop now button below or to the right hand side of this blog for quick easy shopping 24/7 or send me an email, I'm always happy to help.


Happy stamping

Lucie x 
http://www2.stampinup.com/ECWeb/ItemList.aspx?categoryid=2693&dbwsdemoid=5010189


Wednesday 25 March 2015

Love life - saleabration stamps- available while stocks last!

Hi stampers,
  For today's cards I used the love life saleabration stampset, which I one of the free products available when you spend £45 on stampin'up products.


Card base it at 8 x 5 1/2 , scored at 4  
1st layer 4 x 5 1/4
2nd layer 3 3/4 x 5 


In the first card I used the kingfisher stamped with tuxedo Momento black ink, which I coloured using the Aqua painter with Bermuda bay, daffodil delight and melon mambo and early espresso.

I created the background with a circle frame mask I created using the circle framelits, which I sponged over with blushing bride ink. 

Adhered the whisper white base, bermuda bay and stamped layer and finished with melon mambo candy dots.

For the second card I used the lemon stamp, which I stamped three times along the top of the whisper white second layer ( cards sizes and layer , same as above )  using tuxedo black moment ink, which I coloured in using the aqua painter with daffodil delight and pear pizazz.
I punched whisper white circle with 1 3/8 circle punch  and the scalloped circle punch layer in daffodil delight.
I stamped the love life sentiment in black and finished it of with daffodil delight candy dots.
I hope you feel inspired by the cards I've made today and I would love to see your versions.
If you would like to purchase any of products used today  and earn the love life saleabration stampset, which is abailable until March 31st. Click the shop now button or alternatively send me an email as I'm always happy to help.
Happy stamping 
Lucie x 
http://www2.stampinup.com/ECWeb/ItemList.aspx?categoryid=2693&dbwsdemoid=5010189http://su-media.s3.amazonaws.com/media/catalogs/2014-2015/2015_SAB/20150106_SAB_en-EU.pdf


Tuesday 24 March 2015

Guy greeting collage style male themed cards

Hi stampers, as you have probably guessed I a really into the collage style of stamping at the moment as seen in my previous post using the butterfly basics and postage due stampsets, which was very girly.
Well today's cards are male themed cards using the guy greetings stampset


For the card above I cut the card base at 8 x 5 1/2 in very vanilla cardstock
1st layer in chocolate chip cardstock 4 x 5 1/4
2nd layer in very vanilla again 3 3/4 x 5 

Using the second layer, the very vanilla cardstock I randomly stamped the hats and shoe images in smoky slate and chocolate chip ink, so I stamped of first to get a lighter image. Then I randomly stamped the no one else could fill your shoes sentiment in the leftover blank spaces to create a fab masculine background.

Then using a non SU die I cut the shape in chocolate chip cardstock and using the oval framelits cut and oval in very vanilla on which I stamped the Father's Day sentiment in tuxedo black Momento ink.

Adhered all the layers with tombow liquid glue and finished off with two chocolate chip candy dots from the neutrals pack. I later added the hi die cut from very vanilla cardstock, which I cut with the die from the label flip card framelits pack.


The second card was cut the same sizes as mentioned above in the same colours, very vanilla and chocolate chip cardstock.
Taking the very vanilla second layer I randomly stamped the hats,shoes,anchor,tools and car images in crumb cake and smoky slate ink.

I cut the two smaller square pieces using my square framelits in chocolate chip and very vanilla and stamped the car image on the very vanilla piece in crumb cake.

I then used a die from the chalk talk framelits, which I cut in chocolate chip and finally using the large oval punch in very vanilla I stamped the to a classic sentiment in chocolate chip. Adhered all the layers to the card using tombow glue and Dimensionals for the sentiment and finished it off with two chocolate chip candy dots.

I hope you are inspired to make your own version of the this card or you are more than welcome to C.A.S.E.mine.

To purchase any of the products used in the project please click on the shop now button or send me and email , I'm always happy to help.

Happy stamping 

Lucie 

http://www2.stampinup.com/ECWeb/ItemList.aspx?categoryid=2693&dbwsdemoid=5010189


Monday 23 March 2015

Butterfly basics and postage due vintage collage effect cards

Hi stampers
 Today's cards are very shabby chic, I love how they turned out and expect to do more in this style.

 
I am really enjoying using the masking technique, which I haven't used for a very long while! 
Once the masking and stamping is done, these cards comes together very quickly.

I'm loving the butterfly basics and postage due stampsets together, I think they really compliment each other very well.

Very vanilla Card bases cut at 8 x 5 1/4 and scored at 4
1st layer - blushing bride cut at 3 3/4 x 5 
2nd layer - very vanilla cut at 3 1/2 x 4 3/4

Happy birthday card  I made using just the butterfly basics stampset, with smoky slate and blushing bride inkpads.

I cut a circle using my circle framelits and with the negative space cut out I sponged the central circle with blushing bride  ink. Then I masked the circle and stamped the butterfly basic images randomly around the circle in the smoky slate and blushing bride inks. I finished of again randomly stamping the image over the remaining blank spaces and sponging the edges with crumb cake ink and stamped the sentiment happy birthday in the centre of the circle with tuxedo black Momento ink.

I then adhered all together on the card blank and voila the finished card! 


This card was done using the postage due and butterfly basics stampset together and I just love how it turned out


Card sizes and layers the same as above.

For this card I started by masking the centre using my circle die cut and stamping randomly with the two stampsets covering the whole of the card layer, using crumb cake, blushing bride and chocolate chip inks.

I then sponged along the outside of the masked circle in crumb cake  and stamped the honeycomb stamp in the centre of the circle in crumb cake before stamping the butterfly sentiment in tuxedo black Momento ink. Again using the crumb cake ink I sponged the edges of the card to give the vintagey look. 

I then adhered all together on the card blank and voila the finished card! 


I hope you like the cards I've created and that it inspires you to have a go at making your own. 

All the products I've used are available to buy from my online shop, please click the shop now button for a direct link.

If you would like to hold a Stampin'Up! Party at your home or mine with a few friend to see what great products we have to offer , then please get in touch and we can start making the arrangements.

I am based in Corby, Northants but I am will to travel within a 30 mile radius ....

For those of you who are not close by or available to host or come to a party I can do lots of alternatives, virtual parts, stamp clubs,product clubs etc.... Just send me an email for more information. I'm always happy to help

Happy stamping

Lucie x

http://www2.stampinup.com/ECWeb/ItemList.aspx?categoryid=2693&dbwsdemoid=5010189


Wednesday 18 March 2015

Blendabilities Product Line Has Been Discontinued


Blendabilities Product Line Has Been Discontinued


A number of customers have experienced quality issues with the Blendabilities product line, which has resulted in frustration for both myself  and my customers.

 Due to the nature of the defect, Stampin'Up!  have concluded that difficulties, dissatisfaction, and product returns will only become more widespread.

The manufacturer is unable to correct the problem in a manner that we are certain would meet our high quality standards and provide us with a stable, long-term solution.

Therefore, after a great deal of deliberation and in order to prevent further disappointment, the Blendabilities product line has been discontinued.

happy stamping
lucie x

Tuesday 17 March 2015

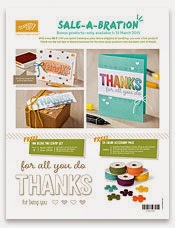
Sale-A-Bration! More items added......!!


Sale-A-Bration! More items


Since Blendabilities are no longer available as a Sale-A-Bration redemption item, Stampin'Up! anticipate that the demand on other Sale-A-Bration items will be higher than forecasted.

 For that reason, all Sale-A-Bration items (with the exception of stamps) will be available “while supplies last.”

 To help alleviate any inconvenience this may cause, they’ve made more items available to redeem for free during these last few weeks of Sale-A-Bration


http://www2.stampinup.com/gb/documents/Flyer_SAB2_demo_Feb1715_UK.pdf

http://su-media.s3.amazonaws.com/media/catalogs/2014-2015/2015_SAB/20150106_SAB_en-EU.pdf


Click on the pictures above for direct links to pdf

to purchase products from our current annual and spring/summer catalogue  and earn free products when you spend £45 and over

please click the shop button 

http://www2.stampinup.com/ECWeb/ItemList.aspx?categoryid=2693&dbwsdemoid=5010189


Stampinbell giveaway !!!

Stampinbell giveaway


A warm welcome to my lovely followers, customers and potential customers! 
It's giveaway time! Being a demo I make lots of cards and gifts, so many I can't possibly use them all for family, friends,downline and customers. So I thought why not give them away...
This giveaway is for two lots of notecard gift sets
Box one has six notecards with envelopes made using the celebrate today stampset and matching balloon framelits.


The second is a set of notecards with matching envelopes made using the Adventure ahead Hostess stampset.


Orders placed from now until midnight March 31st  will all go into a draw.  You can place as many orders as you like, each one will get an entry
New members of my team will also go into a draw. (details of joining offer HERE!)
 2 names will be drawn at random and will receive one of the notecard gift sets as pictured above,chosen by me.
Countries this is open to are – UK, France, Holland, Germany, Austria
*note, every person who places their order with me gets a handmade gift and card from me, this will not change during this promotion*

This is giveaway from me stampinbell and will be sent from my home address And if it's become popular I may do them on a regular basis

Thursday 12 March 2015

Note cards and gift box set - Let's celebrate

Hi stampers,


  Again I've be awol , this time due to nasty cold virus that is going around. Hopefully on the mend now.

Today's project is a set of notecards and envelopes in a fab little gift box case from Samantha Hammond aka pootles papercraft.


It's a set of 5 notecards made using the celebrate today stampset and co-ordinating framelits.

The colours I used were real red,daffodil delight,Coastal cabana,melon mambo, rich razzleberry and tangelo twist.

For the sentiments I used island indigo and pear pizazz

I used daffodil delight for the box ,instructions for this can be found on pootles papercraft you tube page click here for link 

These super simple but striking cards would make a great gift for friends and family any time of the year.

Products used

Cardstock 

Melon mambo
Daffodil delight 
Coastal cabana
Real red 
Rich razzleberry 
Tangelo twist
Whisper white

Ink

Melon mambo
Daffodil delight 
Coastal cabana 
Real red
Rich razzleberry 
Tangelo twist 
Inland indigo
Pear pizazz
Momento tuxedo black 


Stamps and dies sets

Celebrate today stampset 


Balloon framelit dies


Tools and accessories

Stampin trimmer
Tombow liquid glue
Stampin Dimensionals 

If you woul like to purchase any of the items used in this project please click on the shop now link 

http://www2.stampinup.com/ECWeb/ItemList.aspx?categoryid=2693&dbwsdemoid=5010189


Happy stamping

Lucie x 


Wednesday 4 March 2015

Having fun with a big day Stampset

Hi stampers,
 Today's card project was made using the " Big day " Stampset from the saleabration mini catty, you can get this Stampset free when you spend over £45 on Stampin'Up! Products.
http://su-media.s3.amazonaws.com/media/catalogs/2014-2015/2015_SAB/20150106_SAB_en-EU.pdf


I really enjoyed using this Stampset and I'm sure you'll see more projects using it. 


Products used :

Whisperwhite cardstock 
Bermuda bay cardstock 
Crumb cake cardstock 
Bakedbrownsugar cardstock 
Chalkboard cardstock 
Blushingbride cardstock 
Scraps of lost lagoon,tangelo twist,daffodil delight for banners 
Scraps of smoky slate,blushing bride,hello honey,real red, pear pizazz and soft sky  for balloons 
Window sheet

Park lane designer series paper
White gel pen 
Momento black inkpad 
Coastal cabana,crisp cantelope , hello honey Stampin write marker pens 
Regal rose color box chalk inkpad 
Bakedbrownsugar inkpad 
White craft inkpad 
Dazzling diamonds glimmer card
Crispcantelope and night of navy blendabilities
Large oval punch
Word bubble framelits
Banner framelits 
Scallop circle punch
Banner punch 
Decorative label punch
Sequins
Linen thread
White binding ribbon

Big day Stampset
 Georgeous grunge Stampset 
Hardwood background stamp

 Glue dots
Snail adhesive
Red liner tape
Two way glue pen

Stampin trimmer
Stampin score board
Paper snips 
Sponge daubers


If you want to purchase any of the products I used to make these cards. Then please click on the shop now link top right , for a direct link to my online shop

Happy stamping

Lucie 


One tag fits all !

Hi stampers,

For today's card project i used the  "one tag fits all " stamp set, which is another of the salebration stampsets that you get free when you spend over £45 on Stampin'Up! products.

This is a really cute stampset that co- ordinates with a few of our punches, the banner punch, whats up,itty bitty accents and note tag punches.


 For the card above I also used the new bow builder punch from the new spring/summer mini catty, its just so damn cute!


Products used :

Whisper white note cards and envelopes
Daffodil delight cardstock 
Whisperwhite cardstock 
Basic black cardstock
Glimmer cardstock 
Chalkboard cardstock 
Lost lagoon cardstock
Back to black designer series paper
Moonlight paper stack 

One tag fits all Stampset 
I love lace background stamp

Versamark inkpad 
White embossing powder
Regal rose chalk inkpad
Momento black inkpad 
Silver encore inkpad
Coastal cabana inkpad 
Crispcantelope ink pad
Blendabilitie pens in daffodil delight and calypso coral 
Blender pen and strawberry slush ink pad 

Tag punch 
Bow builder punch 
Oval framelits
Gift box punch board
Ribbon
Sequins
Glue dots
Red liner tape
Snail
Dimensionals 
Stampin trimmer
Paper snips


If you would like to buy any of these products please click on the shop now button or alternatively contact me 

Happy stamping

Lucie x